
How Fingerprint Authentication Works in SSD Enclosures: A Technical Breakdown
Fingerprint SSD Enclosure is a compact aluminum enclosure that combines biometric fingerprint security with a high-speed USB 3.2 Gen2 interface. It supports both M.2 NVMe and SATA SSDs (M-Key/B+M-Key) up to 2280 size, and even accommodates tiny 2230/2242 drives using the included standoff screws. Compatible SSDs span both PCIe (NVMe) and SATA III (6Gbps) types. In practice, this means you can use a wide range of M.2 drives, including the latest PCIe 4.0 NVMe modules, and enjoy transfer rates up to the USB 3.2 Gen2 limit of ~10 Gbps (~1250 MB/s). Unlike a basic USB enclosure, the adds a TFT status display (showing the SSD protocol, temperature, capacity, health, etc.) and a biometric lock for hardware-level AES encryption. It works on Windows (7–11), macOS (10.14+), Linux (kernel 3.0+), Android (10.0+), and even iOS 16+, making it universally compatible for both desktop and mobile users.
Device Compatibility and Interface

The supports M.2 NVMe and SATA SSDs in 2230, 2242, and 2280 sizes. (For the shortest 2230/2242 cards, use the included I-shaped screws to secure the drive in place.) It is compatible with PCIe 3.0 and 4.0 NVMe SSDs (up to PCIe 4.0 x4) and with M.2 SATA III (6 Gbps) drives. On the host side, the enclosure uses a USB-C port with USB 3.2 Gen2 (10 Gbps) support. This means large files (videos, backups, etc.) transfer at very high speed (theoretical max ~1250 MB/s) on a Gen2-capable port. In real use, throughput will be limited by the SSD’s own speed and the host PC’s capabilities, but will never exceed the 10 Gbps USB limit. The device is plug-and-play (no driver required) and draws standard USB power (≥5 V, 900 mA).
Display & Cross-Platform Support
A built-in TFT display continuously shows key drive status for real-time monitoring. The screen indicates the SSD protocol (NVMe vs SATA), connection speed, temperature, total capacity, partition info, health percentage, and even the current read/write status. This makes it easy to verify that your drive is recognized and healthy without extra tools. System compatibility is broad: it works with Windows 7/8/10/11, macOS 10.14+ (Mojave and later), Android 10.0 or higher, Linux (kernel 3.0+), and iOS 16 or above. In short, the can plug into almost any modern PC, laptop, or mobile device (via USB-C), making it ideal for users who switch between platforms.
Fingerprint Enrollment and Security
The standout feature of this enclosure is its fingerprint access control. You can register up to 20 fingerprints for unlocking the drive. Initial enrollment is simple: after unlocking the enclosure, long-press the fingerprint sensor until a blue light appears. Then press your finger at different angles until a green light confirms the enrollment (that’s one fingerprint). Repeat for a second finger. To add more later, long-press again until the blue light and keep scanning. The enclosure’s indicator lights guide you—green indicates success, red indicates a scanning error. If recognition fails, make sure the finger is clean, dry, and fully covers the sensor. You can also re-enroll any fingerprint if needed.
Biometric security is generally more robust than a simple password. Fingerprint data is hard to copy, and there’s no password to leak or forget. When used with a hardware-encrypted SSD, the offers a dual-lock approach (fingerprint + disk encryption key) for maximum protection. In practice, this means no one else can unlock or read the data without your registered fingerprint. (For comparison, traditional password-encrypted drives rely on knowledge of a password, which can be compromised; here your fingerprint itself acts as the key.)
Encryption Standards and Data Protection
Under the hood, the enclosure supports OPAL 2.0 (also known as Pyrite 2.0) hardware encryption standards, which implement on-the-fly AES-256 encryption in the drive’s controller. Many modern NVMe SSDs include OPAL/ Pyrite support (especially business- and gaming-class models), but they must have a PSID (Physical Security ID) code printed on them for factory-reset purposes. Confirm OPAL/Pyrite support by checking your SSD’s datasheet or using a tool like CrystalDiskInfo. Confirmed drives include Western Digital SN350/SN740 and Samsung 980 PRO/990 PRO series (each with a PSID).
When a hardware-encrypted (OPAL) SSD is used in this enclosure, it will remain locked (unreadable) until the correct fingerprint is provided. If the enclosure is lost or broken, a hardware-encrypted drive cannot be unlocked elsewhere; you would only be able to reset it with the PSID, which wipes all data. In contrast, a soft-encryption mode (fingerprint only, no OPAL) means another enclosure can access the data once unlocked, but it lacks the extra AES chip security. In both cases, encryption is irreversible once activated. Always backup any important data before setting up encryption, because interrupting the process or forgetting your fingerprint/password will permanently lock the disk.
In summary: The enclosure’s fingerprint mechanism acts like the first “key” and, if using an OPAL SSD, the drive’s own AES key is the second “key” for dual protection. Check for the PSID on hardware-encrypted SSDs – without it, you risk being unable to decrypt the drive later. Software-only (fingerprint-only) encryption is still helpful for casual protection, but hardware encryption is much more secure and tamper-resistant.
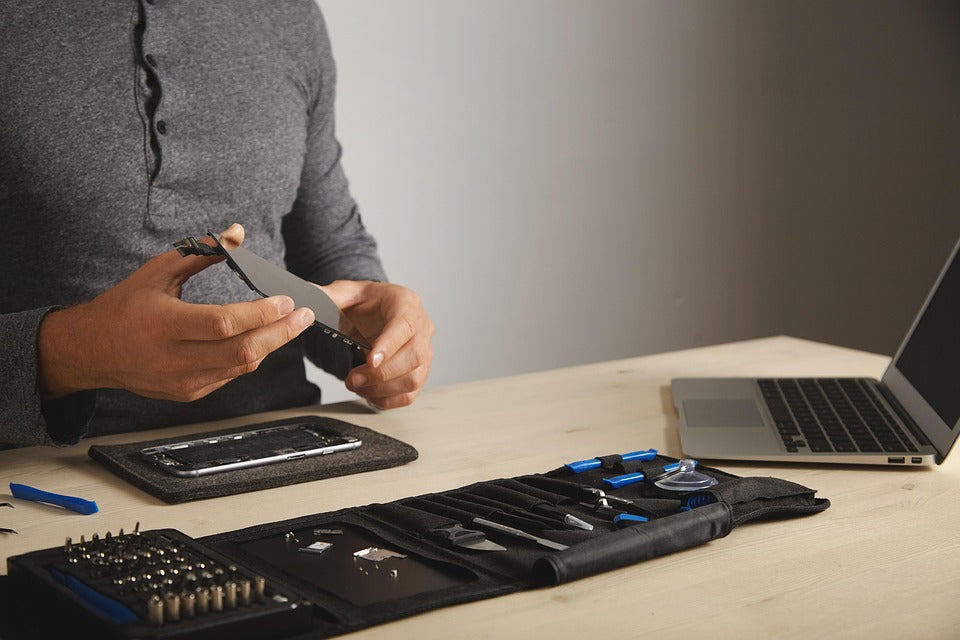
Installation and Usage

Figure: Disassembled kit. Use the included screw and thermal pads for best results. For detailed steps, please refer to our installation video.
- Thermal pads: Peel and stick the supplied double-sided thermal pads to both sides of the SSD (one under the chip side and one on the reverse). This ensures proper heat dissipation.
- Seat the SSD: Insert the SSD into the M-Key slot at an angle, then press it down. Make sure it is fully seated with no gap.
- Screw it down: For 2230/2242 drives, use the provided standoff screw (I-shaped driver) to secure the SSD. (2280 drives have their own mounting hole.) Tighten gently.
- First-time format: Before first use, format the SSD in your computer’s OS (e.g. as exFAT or NTFS on Windows). This prepares the drive for use.
- Please note that you should back up your files before use to ensure that important files are not lost.
- Connect securely: Plug the USB-C cable into the enclosure and host device. Ensure the cable and port are firmly connected. Use a quality USB-C 3.2 Gen2 cable for best speed.
- Power: Make sure your host’s USB port can supply at least 5 V, 0.9 A. Most USB-C/Thunderbolt ports do this easily. For mobile devices, formatting the drive as FAT32/exFAT may be required for compatibility.
If the computer does not recognize the drive, try the following: check the USB connection and try a different port or cable. If it’s a new SSD, ensure it’s formatted properly (most OS won’t mount an unformatted disk). Reformat it to a compatible file system (exFAT/NTFS for Windows, FAT32/exFAT for Android). Double-check the SSD is firmly inserted. Avoid using USB hubs or extenders during setup. If problems persist, try the enclosure on another computer or device.
To safely remove the drive, use your OS’s “Safely Remove Hardware” or eject function. Wait until the enclosure’s LED turns light blue and the TFT screen goes blank before unplugging. This ensures all write operations are finished and prevents data corruption.
Device Indicators and Maintenance
The has status LEDs and a color scheme to keep you informed:
- White light: Power is on.
- Green steady: Drive is unlocked and on standby.
- Green blinking: SSD is being read or written.
- Red: Fingerprint error (authentication failed).
- Rainbow breathing: The enclosure is in sleep mode (idle).
- Light blue: Safe-eject complete (it’s now safe to unplug).
There is no special sleep/wake routine – the device remains ready unless manually turned off. The enclosure is plug-and-play on all supported systems (Windows, macOS 10.14+, Linux, Android); no extra drivers are needed.
Operating range: For reliability, use the enclosure between 0°C and 45°C. Keeping the device cool prolongs SSD lifespan. The aluminum body itself also helps dissipate heat.
You can monitor the SSD health via the TFT display (it shows a “health” percentage) or by using a utility like CrystalDiskInfo on your computer. Check it regularly, especially if you plan on using the drive for critical backups.
Troubleshooting Common Issues
- SSD not accessible after unlock: If the fingerprint reader activates but your drive still won’t mount, first check the SSD itself. Try the drive in another enclosure or a motherboard slot to see if it’s healthy. Confirm the file system has no errors (run a disk check). Also ensure the drive was formatted correctly.
- No display or odd behavior: If the TFT screen stays blank or shows garbage, try re-plugging the USB cable and restarting the enclosure (press and hold the fingerprint sensor for 5 seconds). Ensure the USB port provides stable power and avoid using unpowered USB hubs.
- Moisture exposure: If the unit gets wet, immediately unplug it and remove the SSD. Wipe off any moisture and let the enclosure air dry for at least 48 hours before using it again. Do not use heat guns or try to power it on while wet. These precautions can prevent short-circuit damage.
Fingerprint vs. Traditional Enclosures
Traditional NVMe enclosures are simple bridges: they provide a USB interface and plug-and-play speed, but no built-in encryption. The , by contrast, integrates a fingerprint sensor and hardware encryption. In practice, this means your data stays encrypted (AES-256) until the correct fingerprint is provided. Benchmarks show that a fingerprint enclosure like this still delivers very high throughput (around 900 MB/s read) on Gen2 ports, only slightly below the 1,050 MB/s of a non-encrypted enclosure. Users report that the main trade-offs are cost and size: fingerprint models are pricier (often $80–$150 vs $20–$60 for basic enclosures) and slightly bulkier. In return, you get top-tier security and quick biometric unlock (≈0.8 seconds). For sensitive data on the go – professional documents, personal archives, or simply private backups – the extra protection can be well worth the trade-off.
Tips and Precautions
- Backup first: Always back up critical data before enabling encryption. Encryption setup can fail (or be forgotten), and there is no recovery without the correct keys.
- Read the manual: Familiarize yourself with the full instructions before first use. The quickstart steps above cover basics, but the manual has detailed guidance.
- Monitor health: Check the SSD’s health percentage via the TFT or use a tool (CrystalDiskInfo, etc.) periodically. Replace the SSD if health drops or it shows errors.
- Use within limits: Operate the enclosure in normal ambient conditions (avoid extreme heat, cold, or high humidity). This will keep the electronics and SSD in good condition.
- PSID code check: If using a hardware-OPAL SSD, make sure it has a PSID on the label. Without the PSID, you may not be able to reset the drive if you forget your fingerprint.
- Eject safely: Always use your OS’s eject function and wait for the light-blue eject indicator before unplugging. This prevents data corruption.
- Handle with care: Avoid frequent hot-plugging. If the unit ever gets wet, follow the drying steps above. Keep the device dry at all times.
The is designed for technical users who need speed and security in one package. With up to 10 Gbps USB 3.2 Gen2 speeds, support for up to 8 TB SSDs, and advanced OPAL2 encryption, it serves as both a high-performance enclosure and a vault for sensitive data. Its fingerprint lock adds user-friendly protection that far exceeds a normal password. Just remember: because encryption is irreversible, always back up your data before turning it on.
For more information, check out our blog post: Fingerprint SSD Enclosure Guide 2025: NVMe & SATA 10Gbps Performance, Security, and Buying Tips